Quick Start Guide: Create Automated Rules from Scratch
2022-11-15
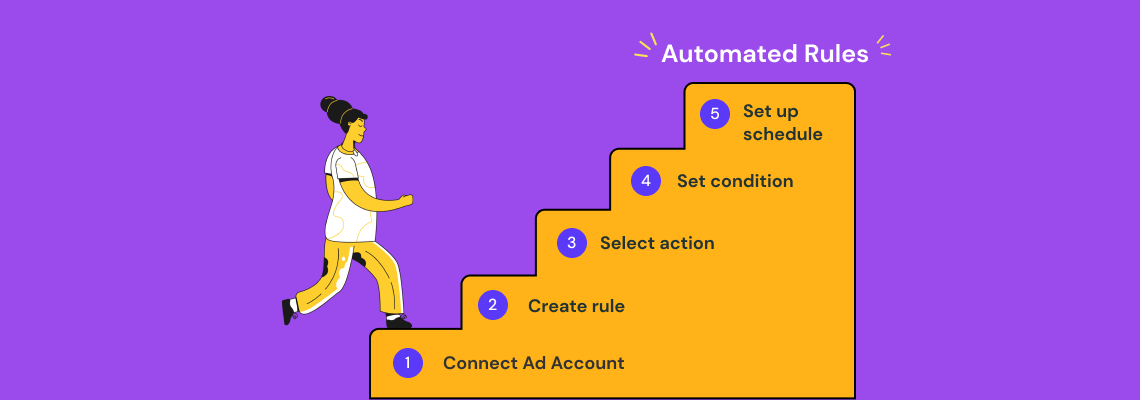
Automated rules are a tool that monitors your ads 24/7 and makes necessary adjustments to your ads based on the selected conditions. Most often, rules either pause unprofitable ads, or increase budget for well-delivering campaigns. You can use these rules for different purposes, like automating your A/B testing process, for example.
In this guide, we're going to look at how to optimize your ad campaigns. We use Facebook to demonstrate how ad automation on ConvertBomb works. However, you can use the guide to set up rules for any advertising platform because the rules creation process is pretty similar across all of them.
This guide is divided into two parts so you can easily skip the first one, which is about Integration, if you have already connected Ad accounts on ConvertBomb, and go straight to the Automation.
1. How to connect an ad account
Before starting to automate ads, it's necessary to connect an ad account. In the left sidebar menu find Integrations. Since this guide is focused on automating Facebook ads, you need to connect Facebook ad account you are going to work with. Then you need to give all the requested permissions to successfully create and run Facebook automated rules.
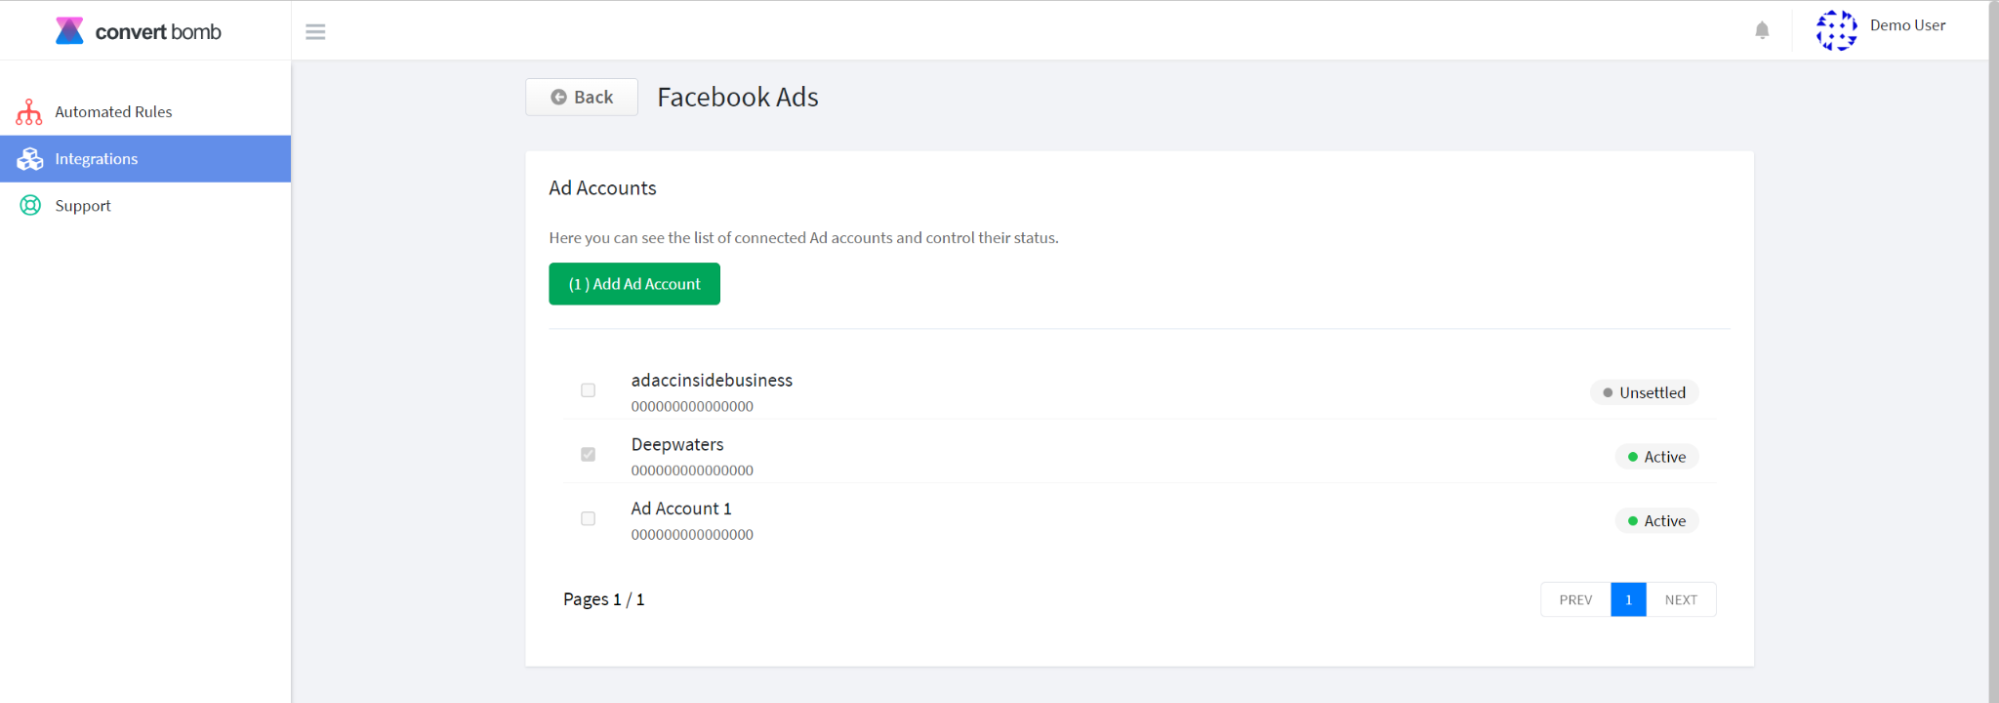
Once the permissions are given, the system pulls up ad accounts you selected at the previous step. To add them to the ConvertBomb you need to tick the boxes near the Ad accounts you want to run Facebook automated rules for.
2. How to create an automated rule on ConvertBomb
Automated rules are based on If-Then statements which means that the selected action will happen to your ads under the predefined conditions. Here are the elements that make up the rule:
1. The scope to which the rule will be applied.
2. The action that has to happen.
3. The conditions under which the rule has to trigger.
4. The schedule when the rule has to run.
In this guide we’ll consider the case where we need to optimize Facebook ads to avoid wasting ad budget. We will show you how to adjust ConvertBomb automated rules to pause ads that don’t bring sufficient results for the money spent.
The case description. A company decided to launch an ad campaign on Facebook. The campaign objective is Conversions. This campaign includes 2 ad sets and 2-3 ads per ad set. The company will consider the campaign successful if ROAS is more than 1 while Purchases are more than 5.
Now let's dive into the process of creating an Automated Rule based on the case description.
To start, proceed to Automated Rules in the left sidebar menu and click green Create rule button.
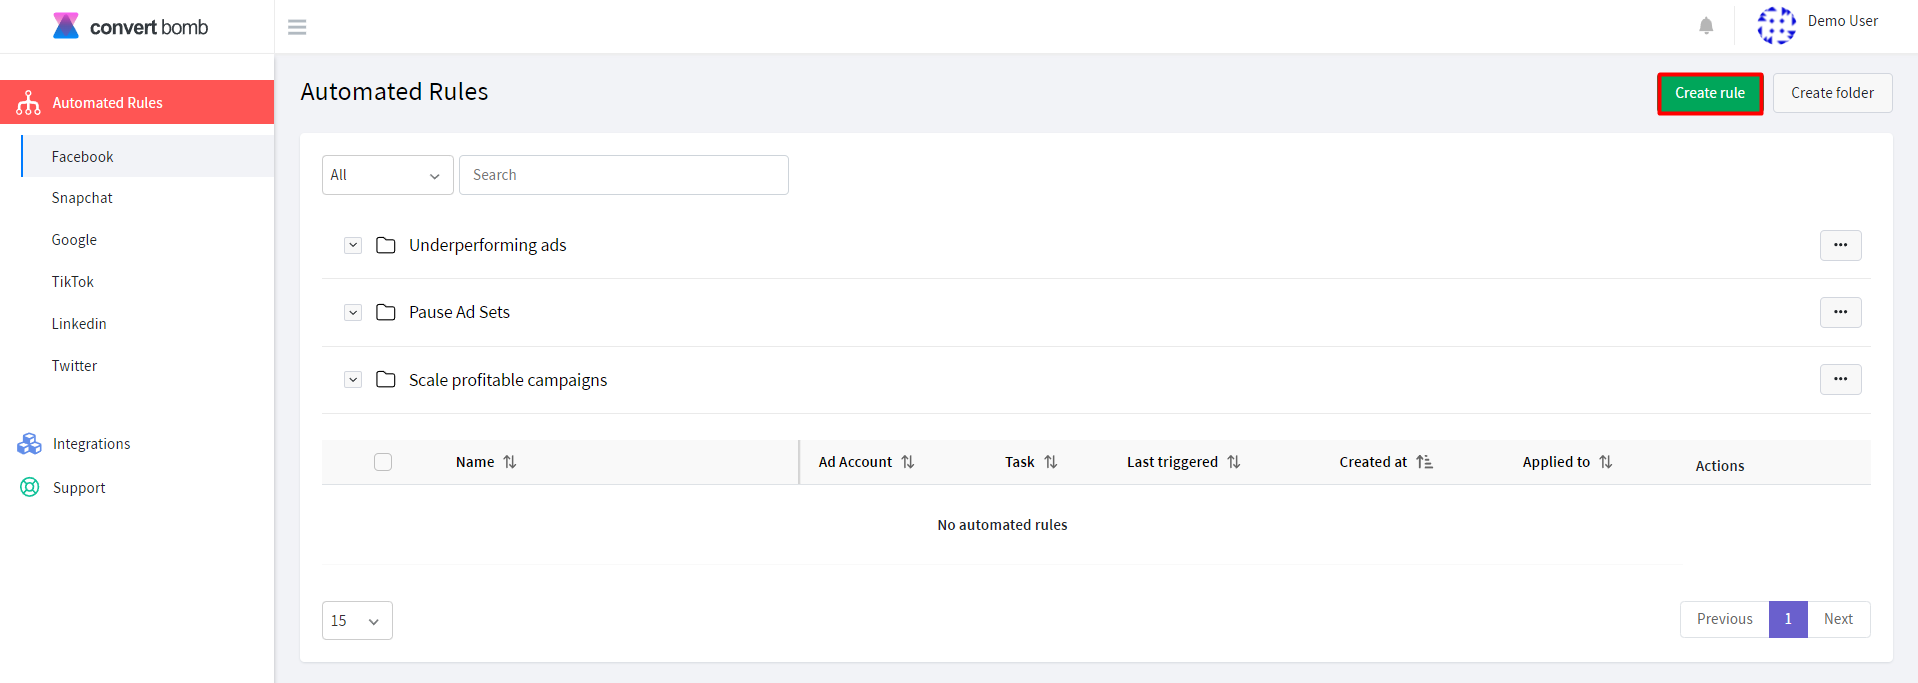
There are two options to choose from. You can create your own rule from scratch or select one from a list of predefined Strategies. A Strategy is a template that you can select and customize the parameters if necessary. You can learn how to use Facebook ad automation strategies in our other guide.
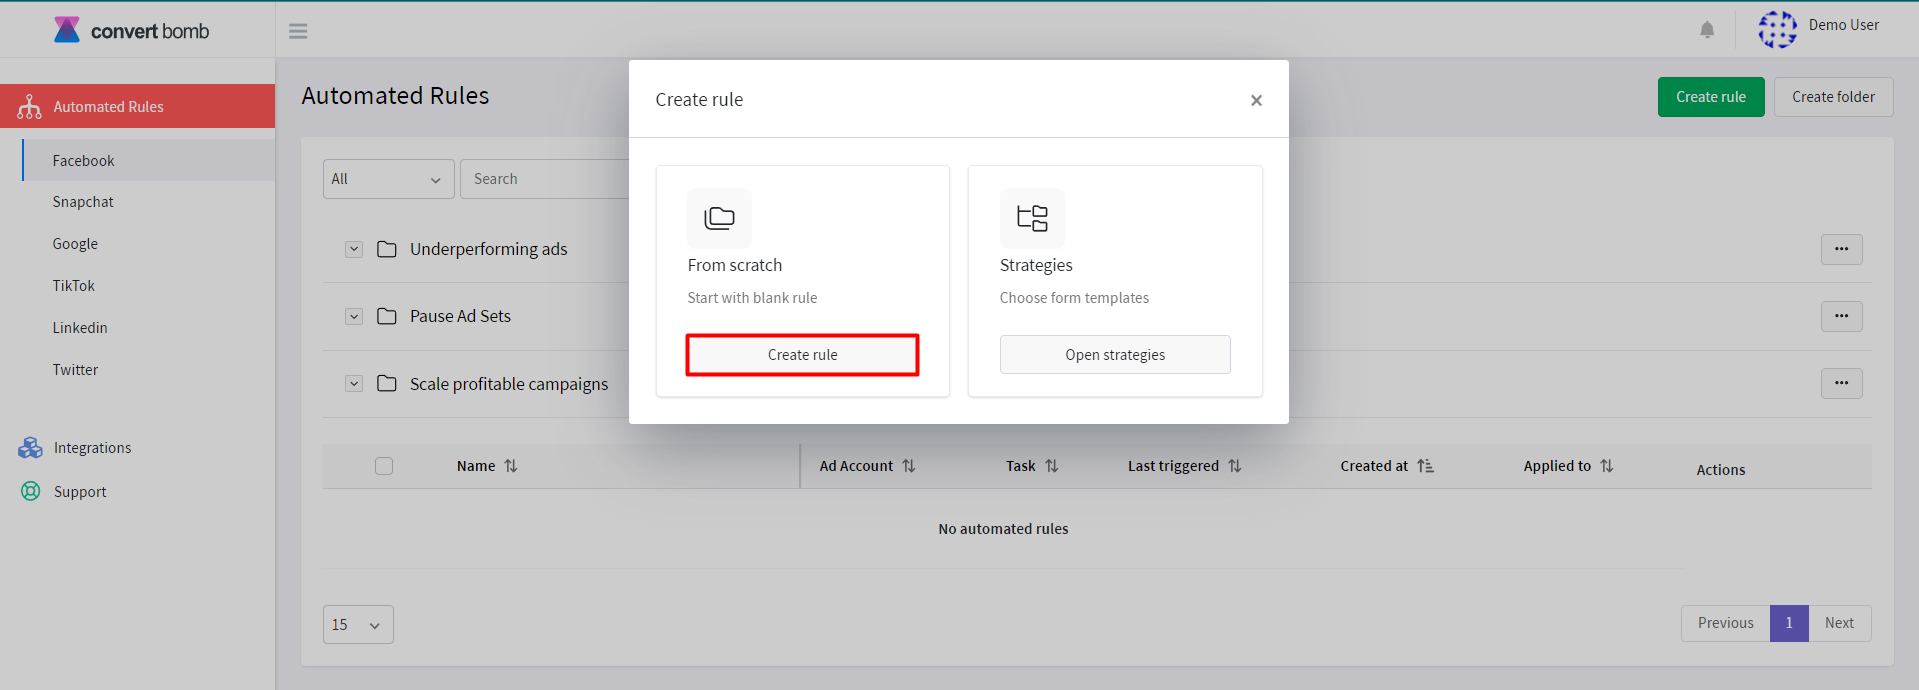
For now, let's create a rule from scratch. It’s essential to give your rule a distinctive and recognizable name that will help you quickly find it among many rules you might create in future. For example, PauseAdSets_IfROAS<1ANDPurch>5_daily.
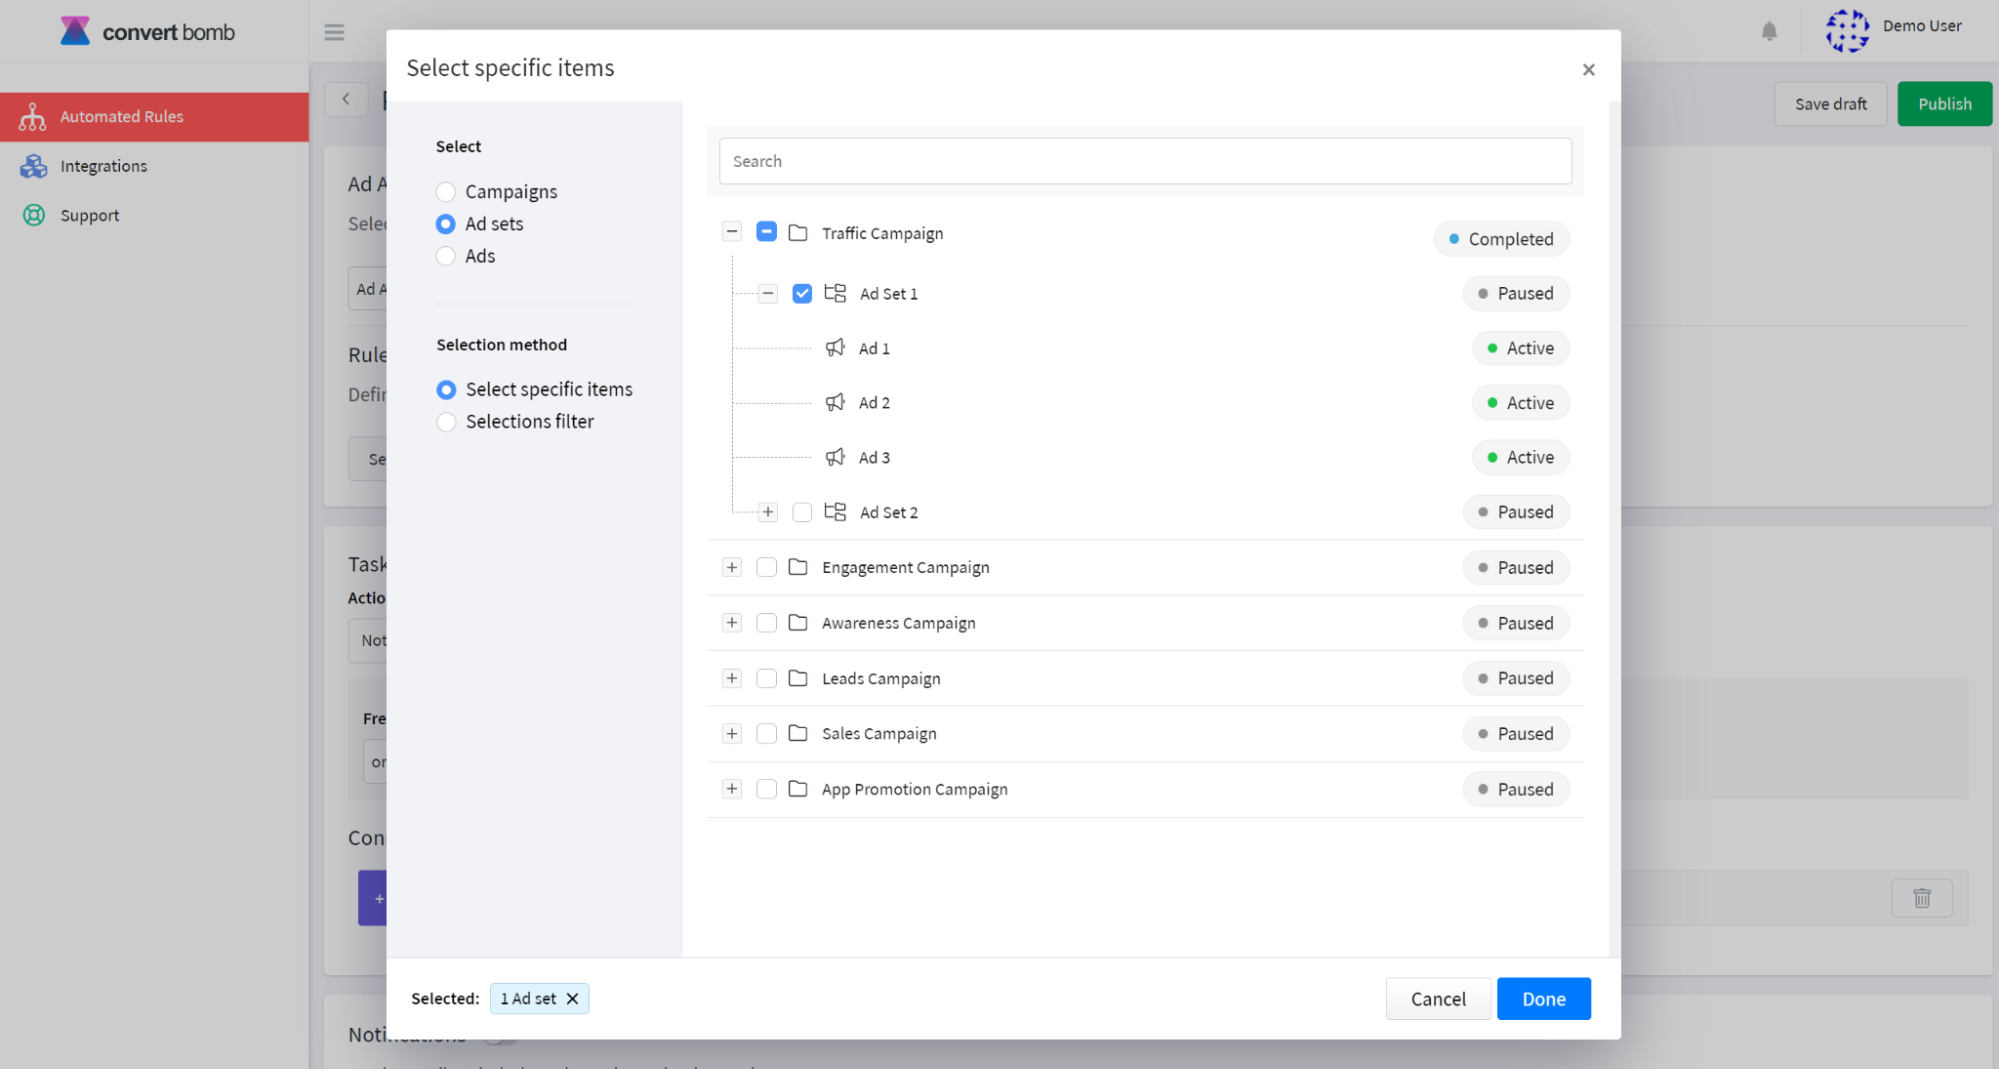
The next step is to set what our rule will apply to. Select the Ad account in the dropdown on the right. Click Select items on the right to select the exact items that the rule will affect.
In the popped up window you will be asked to define the Scope. It means that you need to choose the level your rule will be applied to: Campaign, Ad set, or Ad.
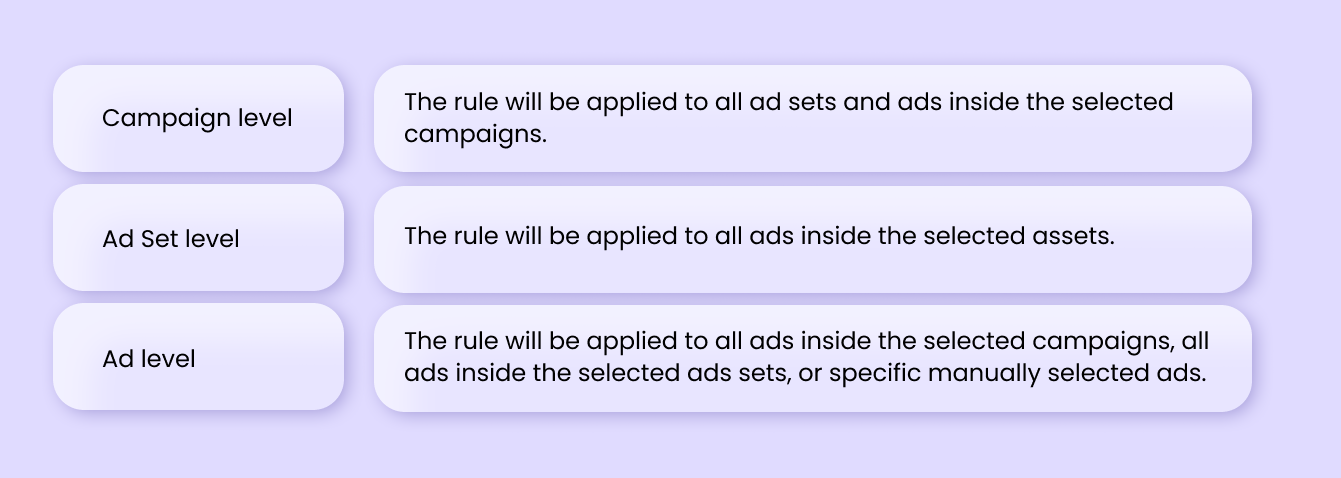
If we want to pick specific ads inside an ad set, we have to click Select specific items and select Ads as a scope, click the dropdown arrow and tick the boxes next to the necessary ads. For our rule, we'll go for all the ads inside one ad set. We select Ad set as a scope and tick the box next to an Ad set to cover all the ads inside this Ad set.
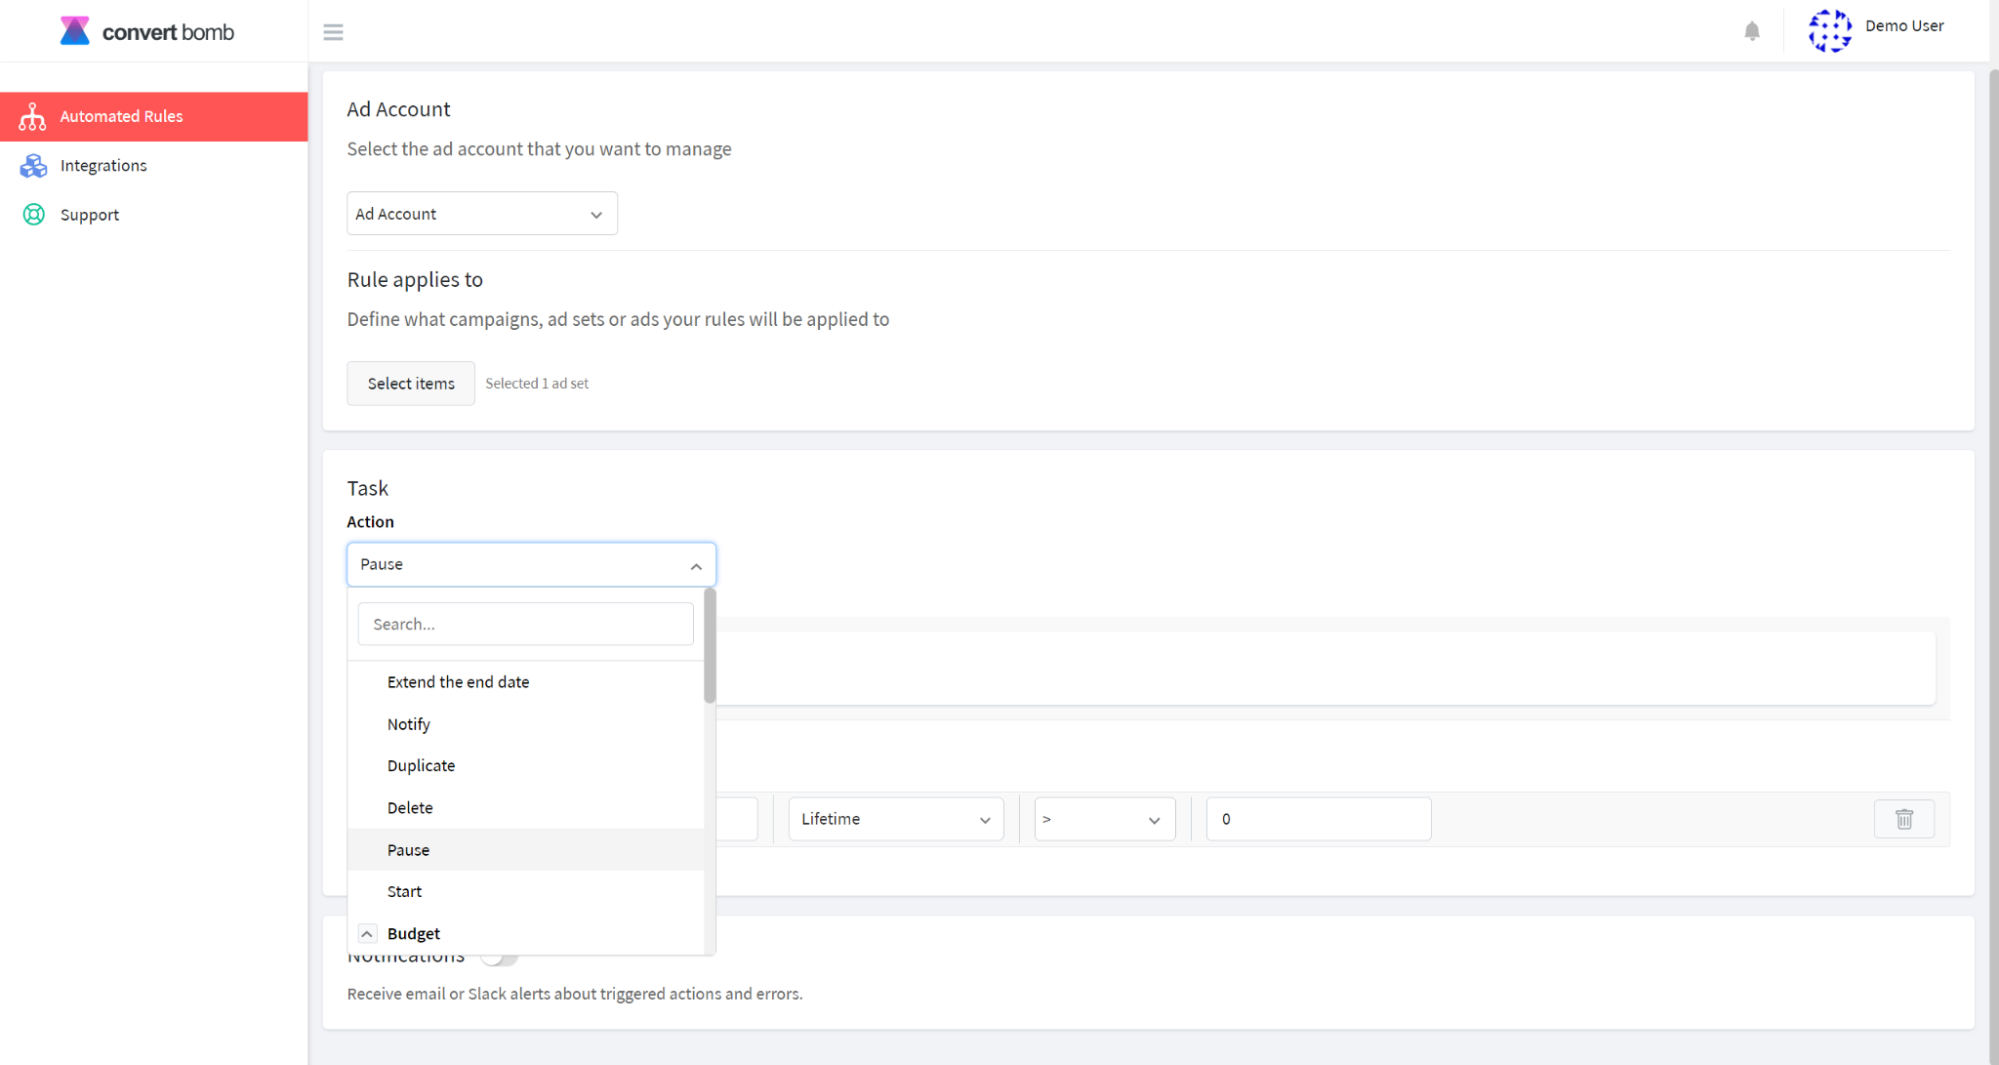
Next part includes selecting the action which defines what will happen to the chosen items under certain conditions. Depending on the item level, the list of available actions will slightly differ. In our case we select Pause action to turn off underperforming ads.
As the next step we have to define the conditions that will trigger the action. There are a few parameters that need to be selected for each condition:
- Metric
- Time frame
- Value
1. Metric. First of all, we need to understand what metrics we use to measure success. In our particular case, it is Purchase ROAS. If ROAS is lower than 1 we will consider the ad underperforming. So the rule we create should check the ROAS metric to make sure that we are reaching our campaign goals and do not waste the budget.
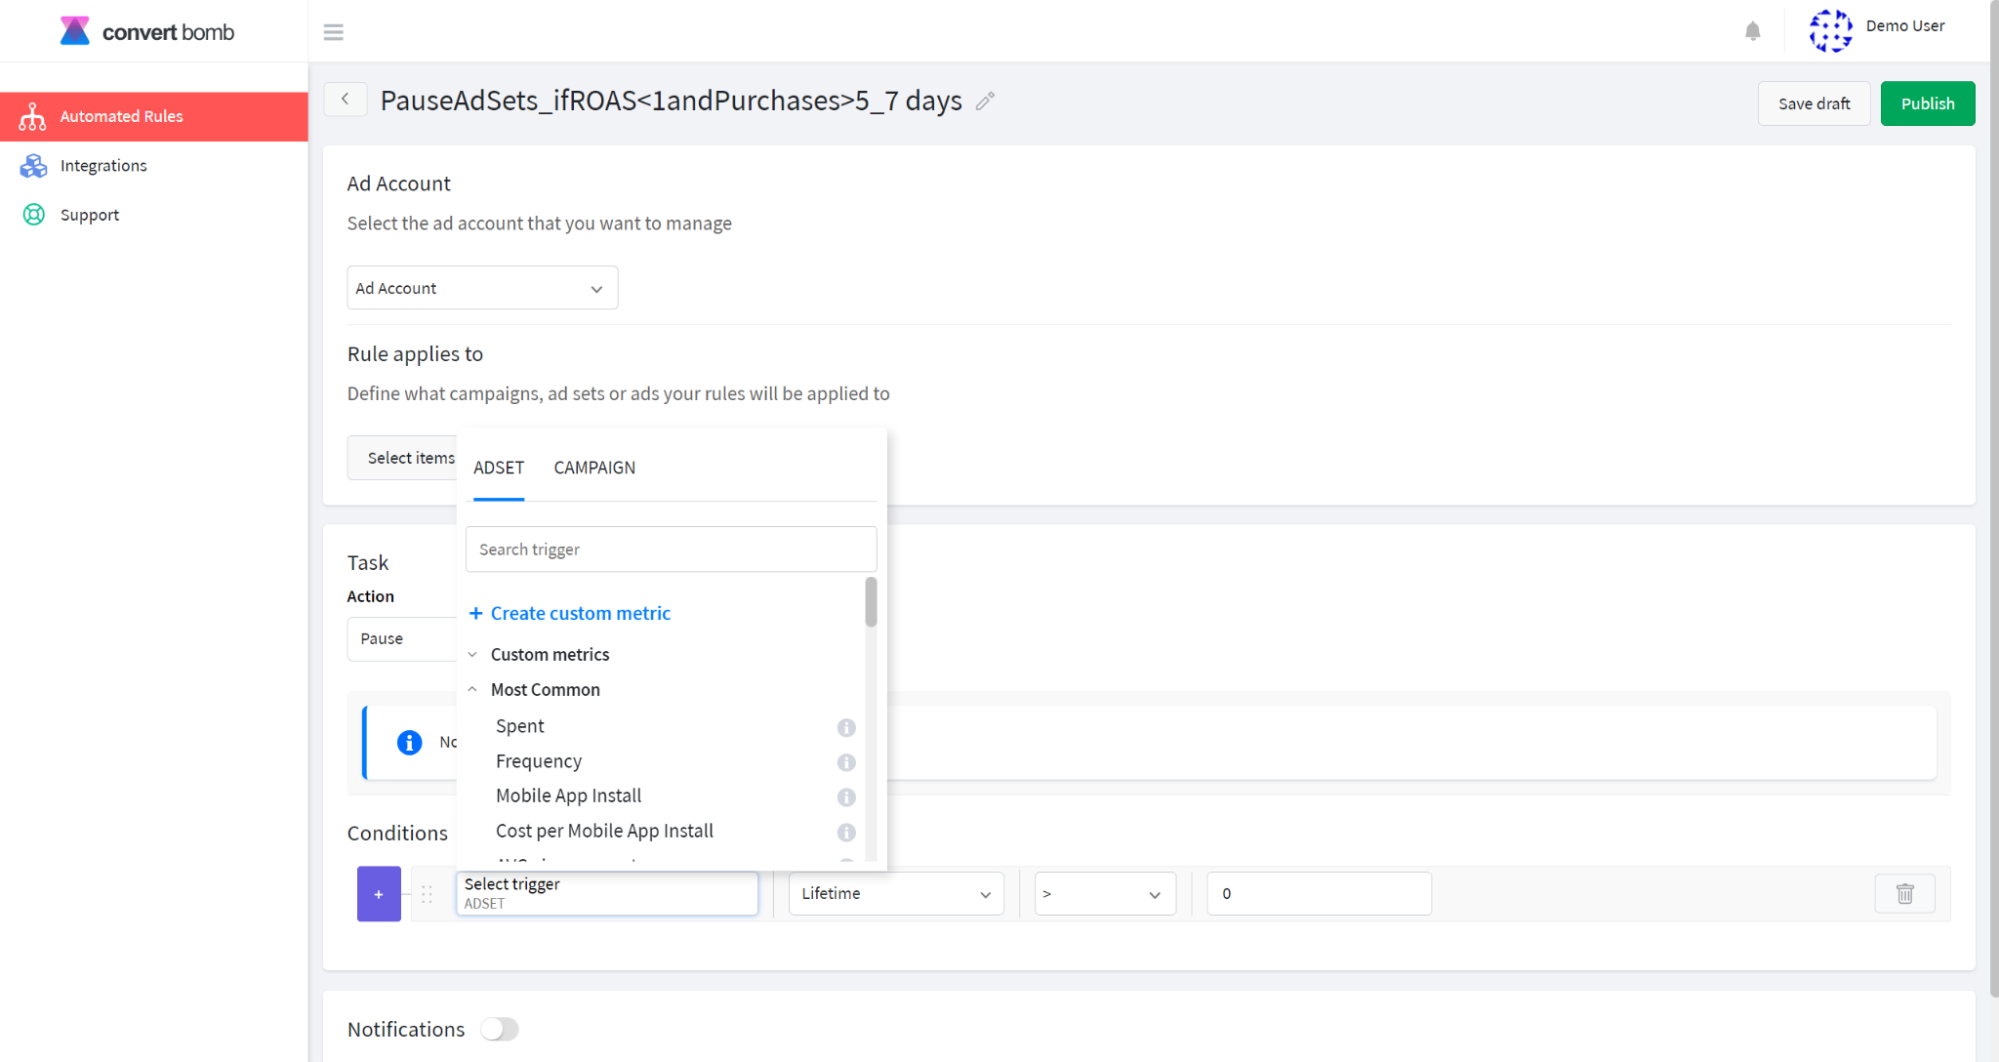
2. Time frame. The rule will be applied to the data collected within the selected time frame. Our product is not of an impulse-buy kind. It can take a week for a person to make a purchase after they first clicked on our ad. For this reason, we select last 7 days including today to measure conversions.
3. Value. Our ads will be considered not unprofitable if they at least bring as much profit as the money we spent for them. For this reason, we select Purchase ROAS less than 1 as a condition under which the ads should stop.
It's a good practice to set a few conditions because relying on a single condition can be risky and lead to unweighted decisions. Click + button to add a new condition or a group of conditions.
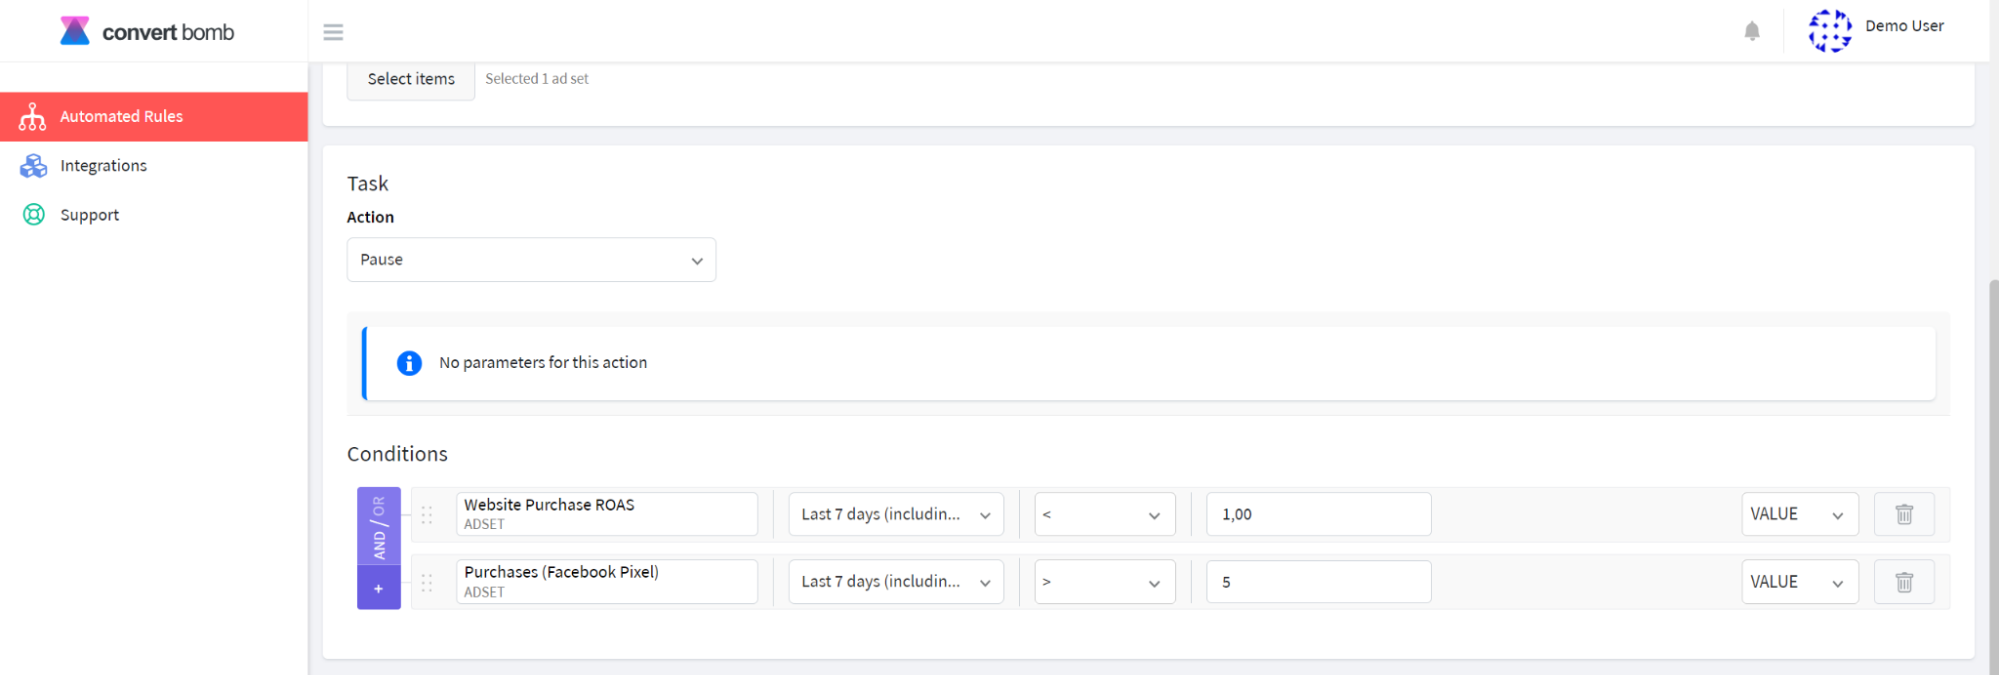
There are 2 options of how the conditions can be interdependent: through OR or AND operator. AND implies that both conditions have to be met, OR means that only one can be true for the rule to trigger. We select AND so that both conditions are met to trigger the action.
We add Purchases metric in a second condition because making a decision on too few conversions does not reflect the whole picture. Let’s make it more than 5 for the last 7 days including today.
That’s how the whole task is going to look:
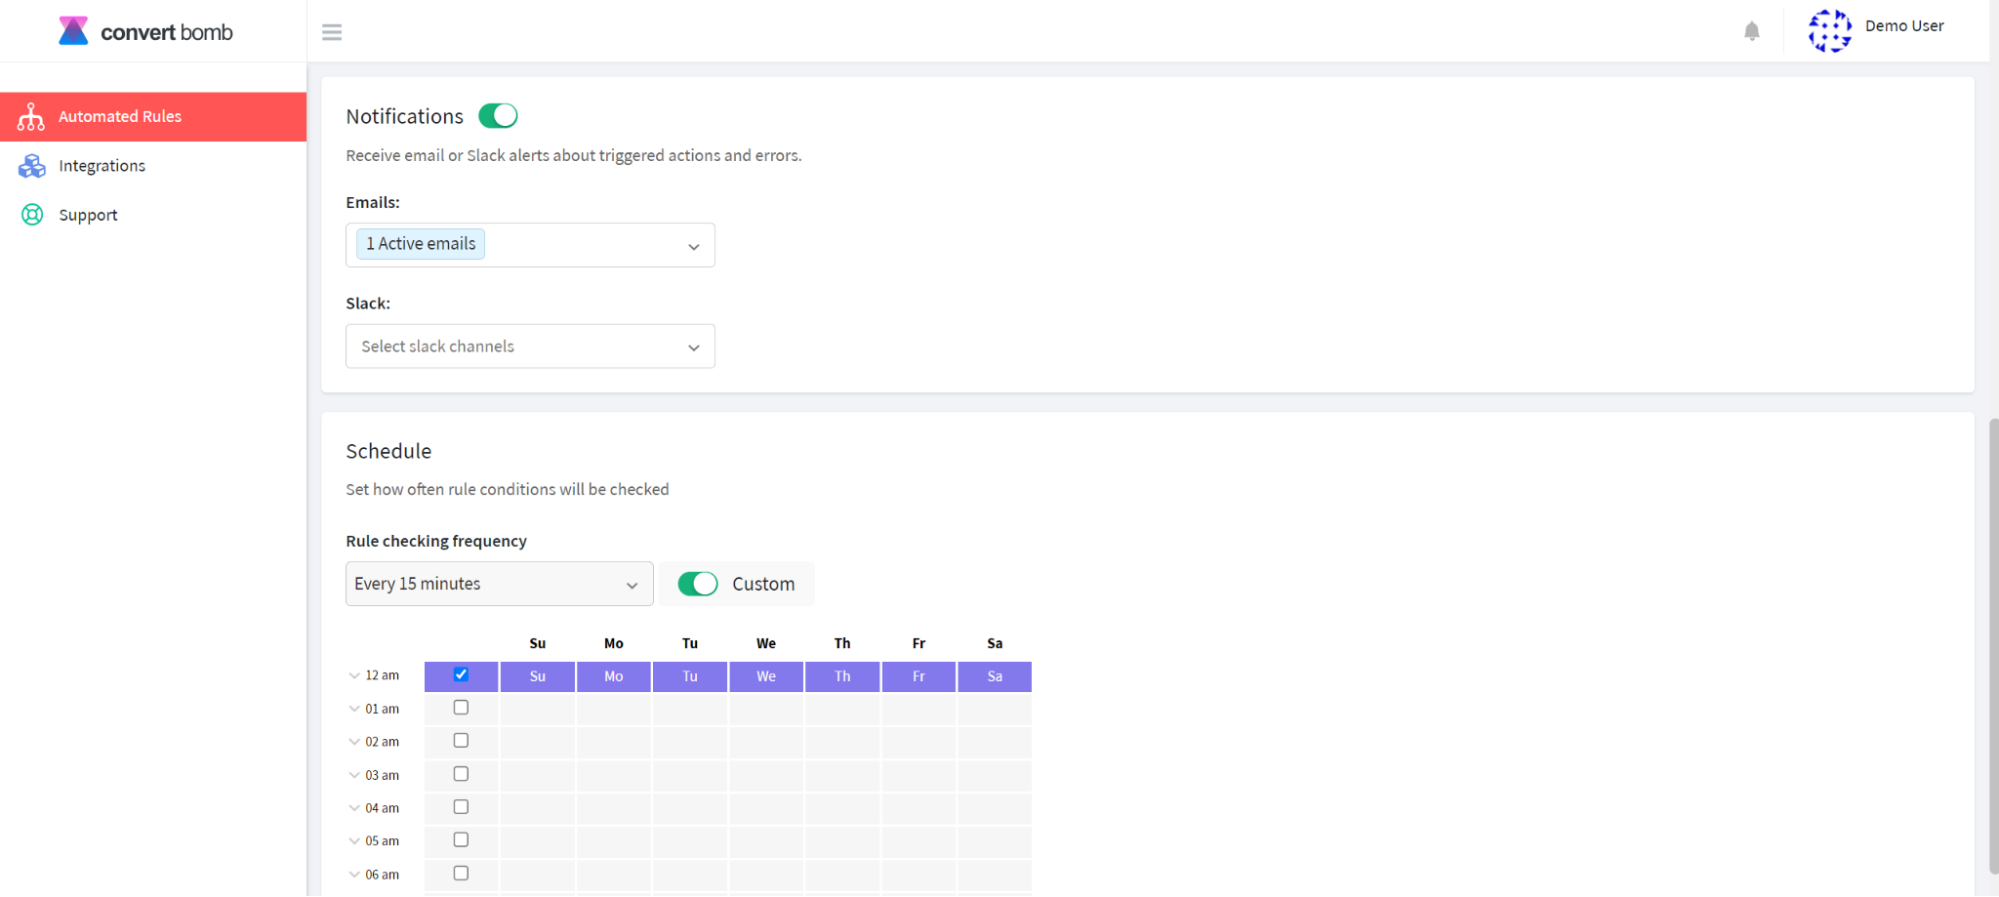
Finally, we have to set the schedule. It defines when your rule is going to run. We can set it to run continuously without limits, only once a day at midnight, or specific hours and days. To make it simple, let’s set the schedule to run the rule once a day at 12 a.m. every day of the week.
Once everything is set up, we click Publish at the top of the page, check the name and the folder to place the rule, then click Save to start the rule. Now the rule is created and enabled.
In Automated Rules section you can see the list of created rules. They are grouped by advertising platforms.
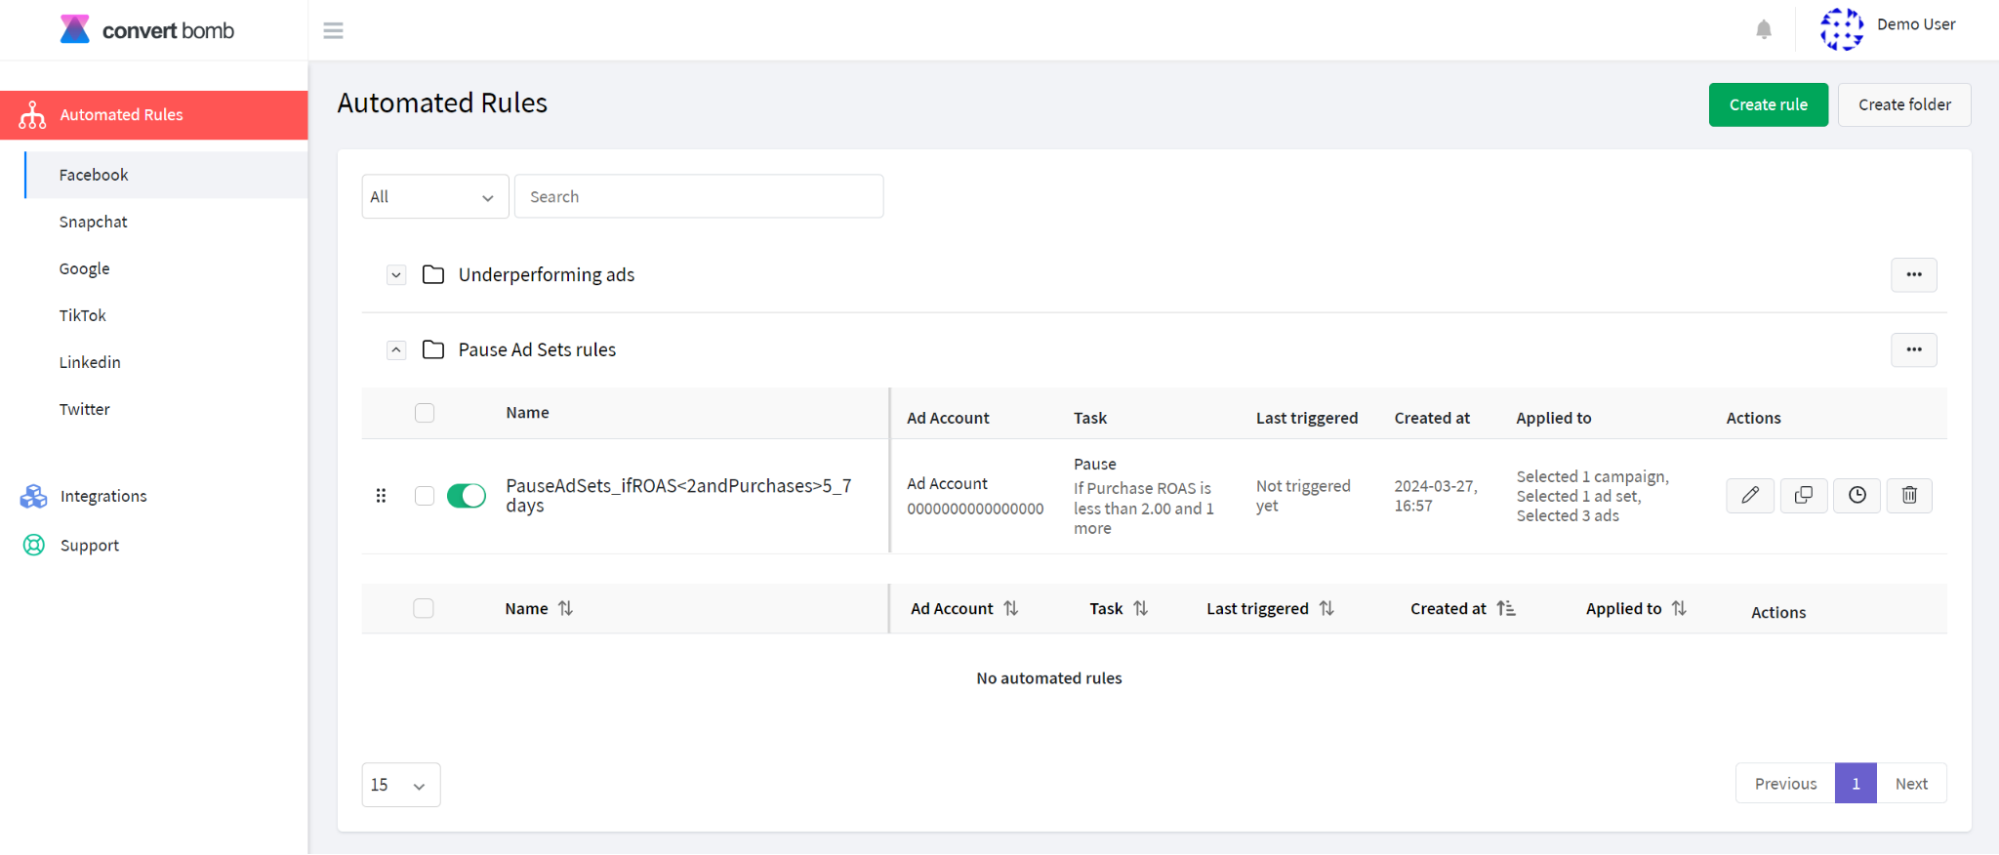
You can manage them in the following ways:
- Delete — it will permanently remove the rule.
- Watch the logs — monitor what changes have been applied to selected items and when.
- Clone — duplicate the rule. This action can be used to create a new rule on the basis of the existing one while adjusting some parameters.
- Edit — that allows you to make changes to your rule. After changes, the rule will trigger according to the new parameters.
Note: In case the action has frequency “Once in a lifetime”, and it has already triggered once, the changes won’t be applied and it’s better to create a brand new rule from scratch.
To sum up, the rule we created will pause the ads that don’t show the expected result which allows us to control the ad spend and not waste budget in vain.
Now you can start creating your Facebook automated rules based on your own marketing needs.

